


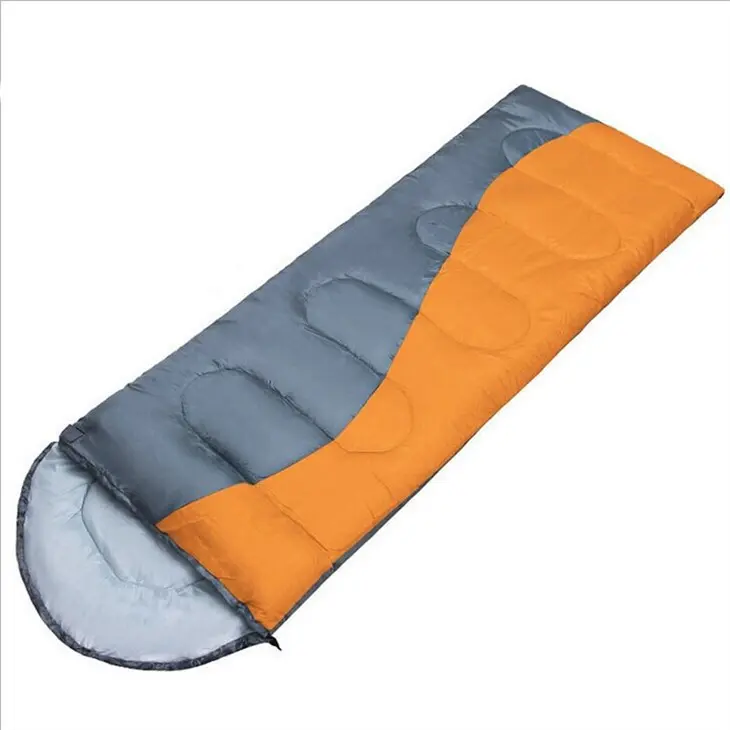
How to make and cut sleeping bags
Making a sleeping bag requires some basic cutting and sewing skills to ensure the final product is warm, comfortable and durable. Here's a detailed guide on the steps to making a sleeping bag, including cutting and sewing.
Materials and tools needed:
Fabric: Choose warm and durable fabrics such as nylon or polyester. You will need two pieces of fabric of the same size.
Fleece or fleece: used for lining to provide extra warmth.
Sewing machine: used for sewing fabrics.
Sewing Thread: Match your fabric color.
Zipper: The opening used to make a sleeping bag.
Fabric scissors, sewing needle, needle and thread, nails, etc.
step:
Measure and cut:
1.Determine the size of sleeping bag you want. Typically, a standard sleeping bag measures 80 inches (203 cm) long and 30 inches (76 cm) wide. You can adjust the size according to your needs.
2.Use a pencil or sewing needle to trace the shape of the sleeping bag on two pieces of the same size fabric, leaving appropriate seam allowances.
3.Use fabric scissors to cut the fabric along the drawn line, making sure both pieces of fabric have the same shape.

Sewing fabric:
- Align the front sides of the two pieces of fabric so that the inside side is facing out.
- Use your sewing machine to sew the two pieces of fabric together along three edges (top and sides), leaving the bottom open. You can use a straight seam or an overlock seam.
Add a zipper:
- Leave enough space on the top seam edge of the bottom opening to install the zipper. This is the opening of the sleeping bag.
- Measure and cut a zipper to match the length of the opening.
- Use a sewing machine to secure the zipper to one side of the opening, making sure it opens and closes smoothly.
- Sew a zipper strap on the bottom opening on the other side to securely secure the zipper to the sleeping bag.
Lining added:
- Sew a piece of fleece or fleece to a piece of fabric on the inside of the sleeping bag to add warmth and comfort.
Sew the bottom:
- Sew the bottom, making sure both the lining and outer fabric are covered.
Tweaks and embellishments:
- Adjust the size of the sleeping bag to make sure it fits properly and is easy to get in and out of.
- If desired, you can add decorative elements such as sewn labels, embroidery or painted patterns to make the sleeping bag more personalized.

Cleaning and maintenance:
- Before use, make sure to clean the sleeping bag to remove any debris or dust.
- Depending on the fabric type, you can choose dry cleaning or hand washing, and then hang dry.
Now you've made your own sleeping bag that's ready for use while camping, hiking, or on your outdoor adventures. Making a sleeping bag takes some time and skill, so if you're new to it, it may take some practice to get better results. If you're new to sewing, consider seeking help from a professional sewist.